Adding a label to your product images will help these across multiple sales channels. When you label the images, you can choose to not send images to the specific marketplaces. This way, you don’t need to delete them from your products.
IMPORTANT NOTE: When you assign labels to the images, you also need to export image urls for each image label. Otherwise, you can’t update the image labels with the bulk file.
Here are steps you need to follow:
1- Select the SKUs and go to “Export>Custom..”
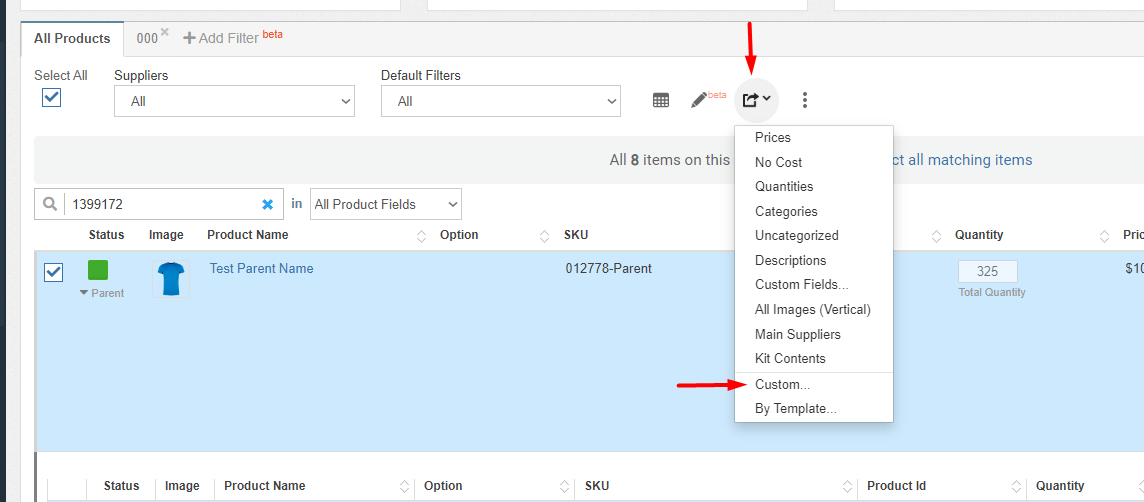
2- Export the image urls and image labels fields together.
Tip: If you select “image urls” and image labels” one by one, the exported file will be in an order like “image_url_1” and “image_labels_1”. This way, you can work more properly.

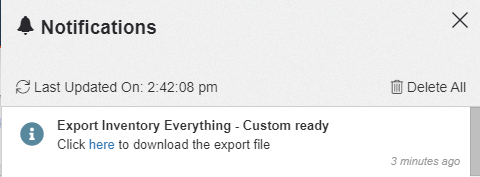
3- Download the file from the “Notification”.
4- Add the labels for each URLs. You can also add multiple labels for each SKU to use that label for excluding the image from other channels.

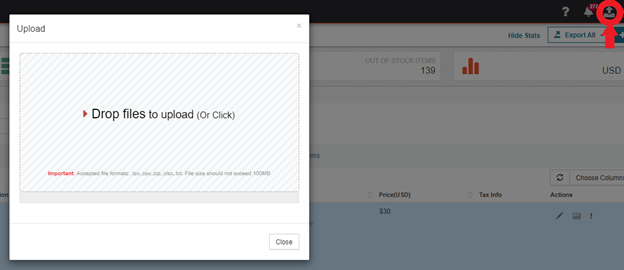
5- Upload the file back in StoreAutomator.
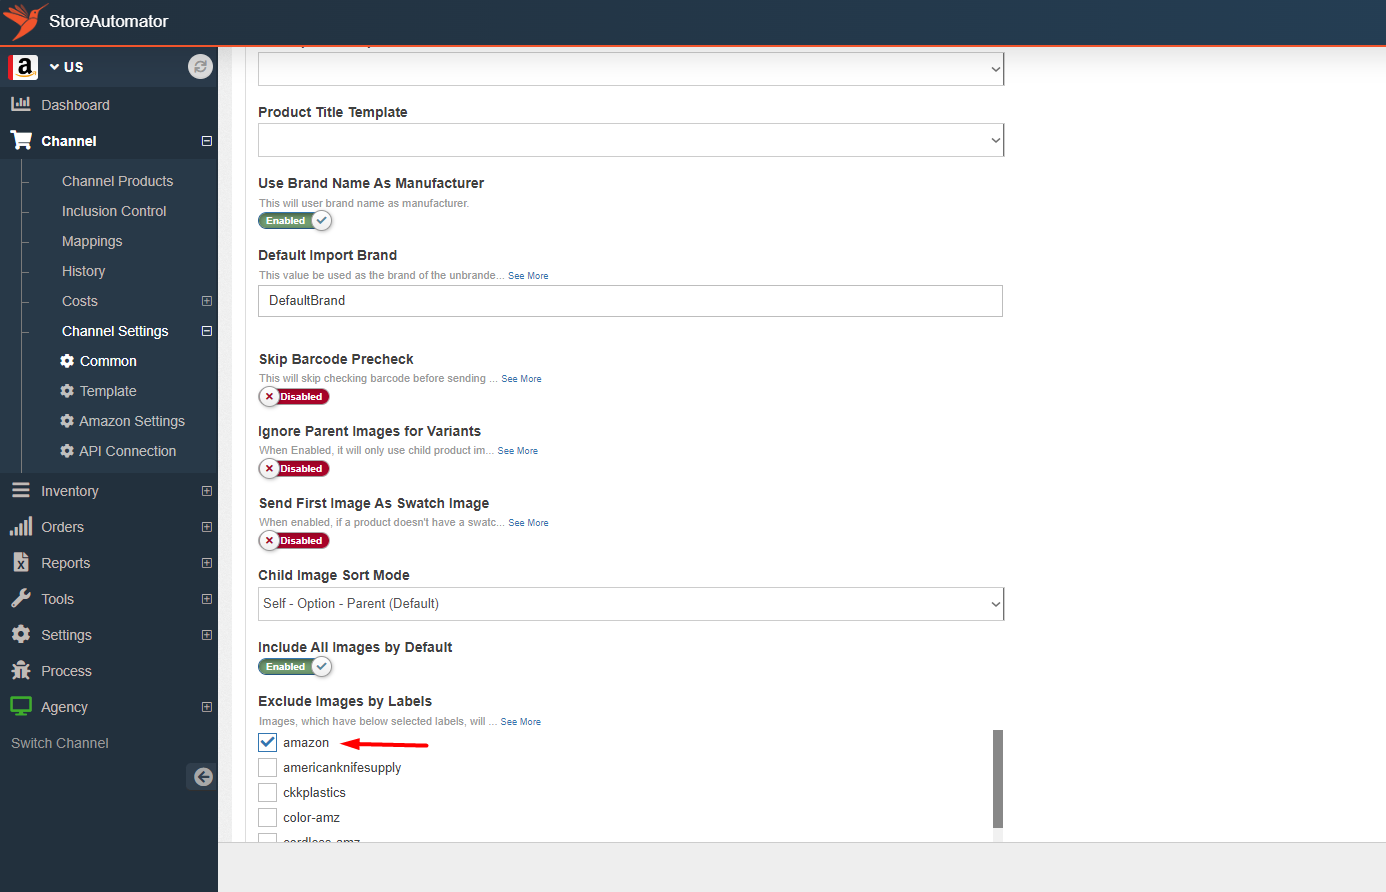
6- Mark the label as excluded from the “Channel Settings>Common>Content” and save the settings. This way the products’ images with the marked image label won’t be sent to the channel.